Sunday, September 7, 2014

Caprese Pasta Salad

 Happy September!  With the close of the summer and the start of fall and the school year I think about how wonderful this summer has been.   I’ve had the opportunity to do new things, improve lessons and activities for my classroom and write blog posts. (Even a few reserves for when school inevitably gets hectic and I don’t have time to do my monthly post.)


We just had our End of Summer Yoga Potluck and after I munched on kale, farro, chickpea salad, some vegan coleslaw and my almost-famous salted caramel cupcakes I thought about how I’ve changed as an eater.  I loved the salad and now will have to try to recreate it and see if B will eat it but growing up I was a picky eater.  Think of the pickiest person you know, then double their pickiness and then maybe, just maybe that was me.  

My mother’s favorite story of how picky I was comes from when I was about 7 and we were going to a family reunion in PA. On the way there we stopped at a diner.  Seems pretty strange since we were heading to a party with tons of food.  However, I did not eat hamburgers, hot dogs, pasta salad, macaroni salad, potato salad, baked beans, or pretty much anything that was at a BBQ.  So my father dutifully stopped and bought two grilled cheese sandwiches wrapped in aluminum foil so that when he was grilling later at the party he could just plop them on the grill to warm them up.   (And yes, I really was/am that much of a princess)

Even now, I’m not a huge fan of a mayonnaise based salads, I’ll try them when someone brings them, but they’re not my go to. 

My go to for BBQ parties is my easy-peasy Italian pasta salad that even pickiest of eaters will eat.
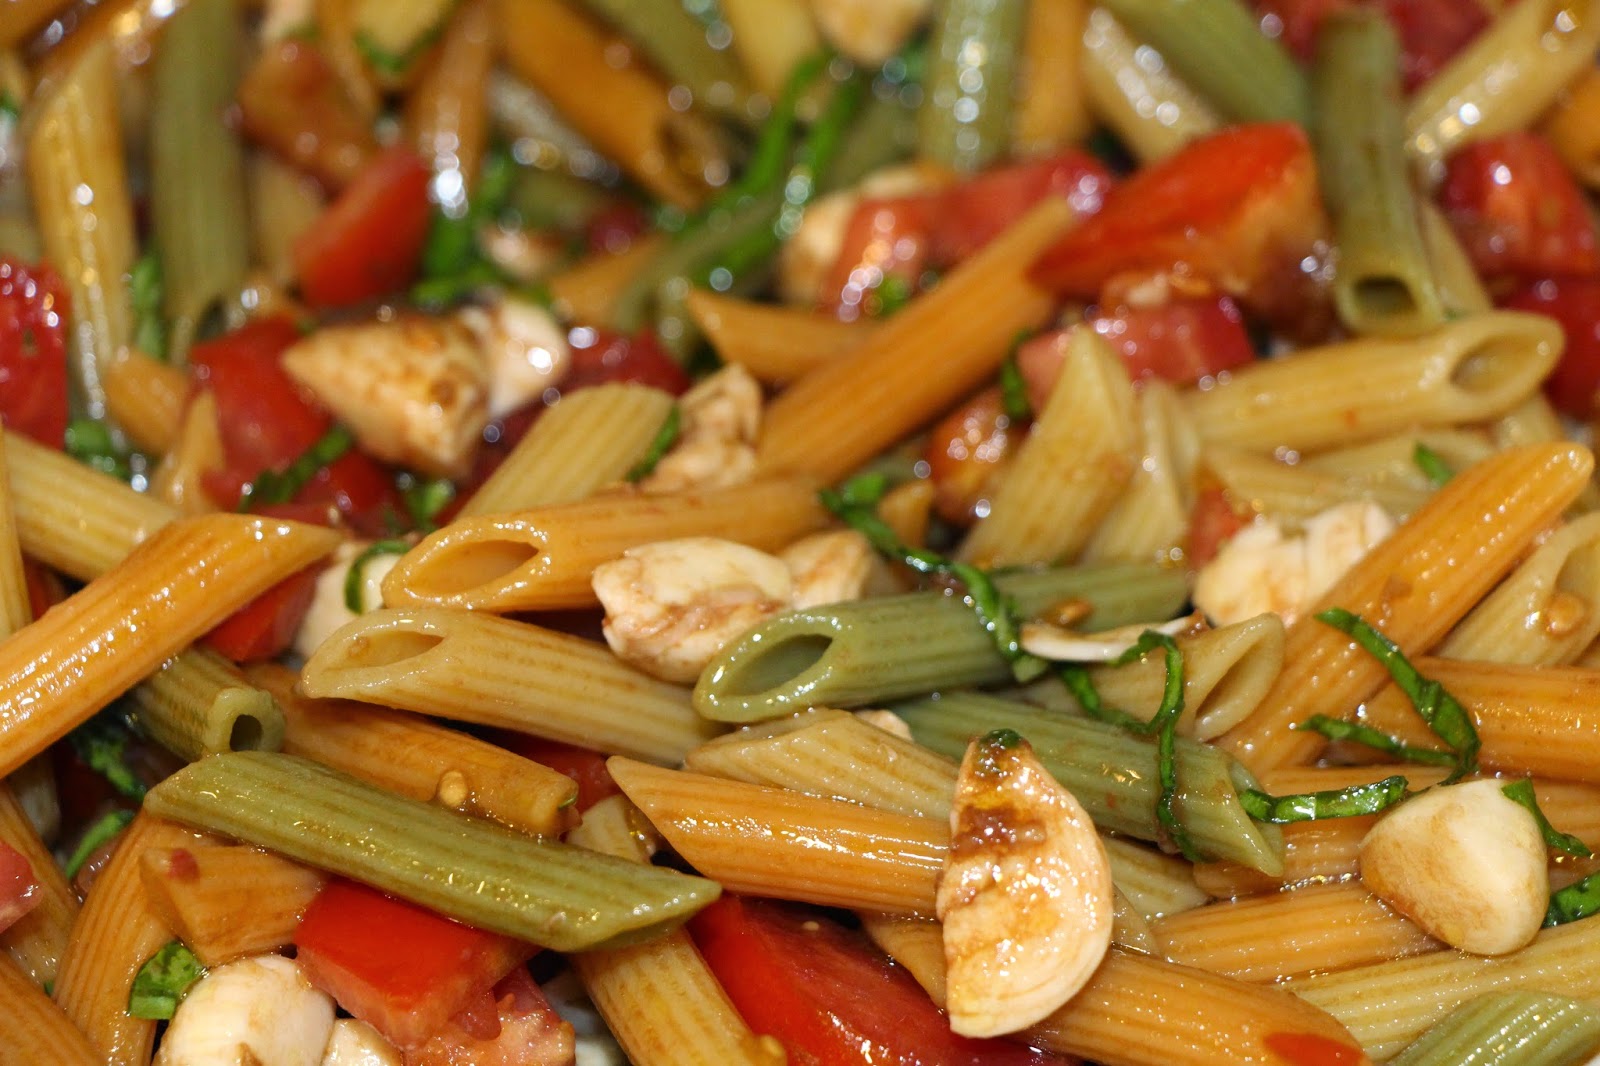
This pasta salad is has a fresh summer caprese feel to it with tomatoes, basil, fresh mozzarella cheese (because cheese makes everything better) and pasta (today I used veggie pasta for some more veggies in there.)


Ingredients:
  • About a 1 pint of Cherry tomatoes or 1-2 full sized
  • 4-5, Basil leaves
  • Half a box of any pasta shape you like. 
  • Either Fresh mozzarella ball cut into bite size pieces or the mozzarella bocconcini about 8oz. I had a little less because I had to do some quality control. 

Dressing:
  • ½ tsp Dijon mustard
  • 3 tbsp balsamic vinegar 
  • 1 garlic clove
  • ½ c of extra virgin olive oil
  • Salt and Black pepper to taste.


1)  Bring a pot of salted water to a boil.  It is important to salt the pasta water because it is the only opportunity to salt the pasta.

2)  Cook the pasta according to the directions on the box.  After straining the pasta run cold water over it.  This will end the cooking process.

3)  While the pasta is cooking cut the cherry tomatoes in half or dice the full sized tomatos.

4) Chiffonade the basil.  Which means roll the basil leaves and cut small strips.

5) If using the fresh mozzarella ball cut into pieces or if using bocconcini, maybe cut in half or quarters.

6) Assemble the pasta salad!  In a large bowl combine the tomatoes, basil, cooked pasta, and mozzarella. 


Now to make the dressing….  I use my favorite Pyrex measuring cup with a spout but you could also make it in a blender or a food processor.  If you're pressed for time feel free to use some bottled balsamic vinaigrette or Italian dressing.  It would work just fine! 

7) Drop in the Dijon mustard and the balsamic vinegar and mix rigorously.  I used a fork because my whisk is too large for the Pyrex.

8) Grate the garlic into the dressing with a microplane.  If using a blender or food processor you can make that do all the work.

9) Slowly, while still mixing mix rigorously, add the extra virgin olive oil.  Add salt/pepper to taste.
10) Pour over the pasta salad and let chill out in the refrigerator for at least a half hour for the flavors to blend.


Yum!!


I usually serve it with a slotted spoon because it is loaded with dressing.  Enjoy!

Sorry for the lack of pictures at the beginning, I forgot until halfway through making it!  

Friday, August 8, 2014

Building Buttercream Basics

I have been enjoying my summer vacation so far, a lot of yoga classes, participated in the CSA with all sorts of new veggies I’ve never had before and tried out tons of new recipes!   

One of the things I did this summer was to sign up for a Michael’s Craft Store class.  It’s a Wilton product based class and it is all about decorating with buttercream.  I’m taking the first course in the series, of which there are four in total.  The class is Thursday nights for a month and conflicted with one of the yoga classes that I usually go to, but I decided to juggle my schedule around because I was interested in the course (Sorry Jenny!) Plus it’s only for August and I’ll be back to Rock It Man Yoga soon.

The first class was last night and it was a BLAST!  I had so much fun and enjoyed working with the instructor, Lori and my fellow classmates.  The first day had a mix of things I already knew, things I had read about and wanted to try, and some new information!  Love that!

We focused one the star tip and different icing techniques that come with it.  I use my star tip from Ateco (oh no! Not a competitor) to usually frost my cupcakes with typical cupcake swirl (Wilton calls it a “1M Swirl” because the size tip that is used) so I was pretty comfortable with those already.


 We did a bunch of little stars with the smaller size 18 tip on one cupcake in yellow. 


And larger individual stars with the 1M tip.


We also looked at the “1M Rosette” which is below in the picture with a striped icing. 


It’s similar to the swirl but starts in the center and works outward instead of outside working in. With the swirled pink and yellow icing it came out so pretty!  


I love that they explained which type frosting technique should be done at 90° degree angle and which should be done at a 45° angle.  And no, I did not pull out a protractor to have it perfectly angled…

It was also great to have someone who is a professional give me constructive feedback.  Lots of positive reinforcement but also some guidance about the amount of pressure to put on the pastry bag.  

I only managed to ice 5 cupcakes while I was in the class but I took this afternoon to make a batch of icing and decorate the rest. 


All the pink and yellow were done in class! 


Here are the ones I finished off at home in purple and green.


This one looks a bit like a hydrangea. 


Here's the open star tip again with a rosette, but it's actually my Ateco (shhhh) which is larger than the 1M. 


These two I think are the prettiest of the bunch, and I can't decide which is prettier.  One is more lavender and the other has some cream color in the center.  Which do you think is prettier? 


or


The class itself isn’t expensive, but there have been a lot of supplies needed and they want you to buy a lot of Wilton products.  Luckily, my instructor has been very down to earth about what you need and what can you supplement from home in a more cost effective way.  She also has the best tips on icing!  What’s your favorite icing technique?

I probably need to head back to yoga class to work off the calories of all these cupcakes! 

Meanwhile, I found this print via Pintrest and I really think that I need it for my kitchen.  Don’t you agree?

Friday, July 11, 2014

CSA - Post 1

This year my husband and I decided to take part in a CSA (Community-Supported Agriculture) with a local organic farm.  This means we paid a flat fee before the season started and each Friday we get a bag of assorted really fresh produce.  We are now into week 5 and I thought I’d share some of the adventures and experiments that have started from them.  

One of my biggest concerns was that we were going to get a lot of kale, so much that I would run out of ideas of what to make with it.  However so far, so good…. (Hopefully I didn't just jinx myself) 

Look at the adorable reusable bag we got the first week!  I use it each Friday to pick up the goodies! 


1st week: Swiss chard, lettuce, mixed greens, oregano and French radishes.  This was an easy group, I made some grilled chicken salad and an awesome Swiss chard frittata.   The French radishes were the only new item to us and we ate them sliced on salads. 

One of the things I noticed is when I’m not sure how to use an item, on strategy is to throw them into a quiche or frittata. 

2nd week: head of lettuce, arugula, mixed salad greens, garlic scapes, Swiss chard, radishes, asparagus, rhubarb, and pick your own strawberries.


Here's a picture of the all the produce the 2nd week! 


One of the best things that I have made with this crop share has been the Arugula and Bacon quiche mentioned in this previous blog post.  The post is for spinach quiche, but you can use the base and just change the fillings. 


I also tried to make strawberry rhubarb pie, although it came out more like strawberry rhubarb soup… It was one of those moments when I did not read the recipe closely enough and screwed up the filling, and well since baking is a science you need to be very precise in the measurements.  However, the taste was great, the only downfall was you needed to eat it with a spoon!  


3rd week:  B and I went away to celebrate our anniversary, but because I have the best parents, my mother actually went to pick up the CSA this week and we split the produce with them.  She kept the basil plant (which is for the better since I have a black thumb) and scallions, we got more salad greens, strawberries, sugar snap peas, cilantro and kale.  (There probably was more this week but this was what I can remember)  I tried to get her to take more, but that’s what she wanted. 

I made some black bean and kale burritos with cilantro rice.  It was inspired off a recipe in food network magazine, but it’s not posted online yet, so sorry no link!  This was a great recipe, and you know it’s good because my carnivore husband at it with no complaints, and even thought it was good enough to have it again.  There are some changes I’d make to the recipe for the next time, but don’t worry I jotted them down.  I also threw some of the leftover kale into the chili the next day!


4th week: Lettuce, Chinese cabbage, chives, cucumbers, kohlrabi, pick your own raspberries and some of the last strawberries.

I was so excited for this week, raspberries are my absolute favorite.  I remember as a kid getting a pint for the car rides home from Vermont and sitting in the backseat just eating them out of the green pint container! 
One night when we had a friend visiting from out of town we made Pioneer Woman's Raspberry Crisp – I halved the recipe just because we had a small pint of raspberries, and omitted the nuts and oats (I couldn't find them and since it was like 10:00 pm, I gave up looking.)


This is a picture of kohlrabi, which I had never heard of before!  I thought it kinda looked like little UFOs.  I peeled them and then chopped, and roasted in the oven with salt, pepper and garlic.  Then finished with some Pecorino Romano cheese.  I thought they were delicious, but there was a slight difference in opinion with B. 

I also made homemade dumplings via Food Network Magazine; I just swapped for the Napa cabbage for my Chinese cabbage and omitted the salt they added.  I felt the soy sauce had enough salt, it didn't need anymore.  There were a few other changes I’d make for next time, but overall it was good. Those wonton wrappers are so easy to use; the hardest part was finding them in the store!

Can’t wait to find out later today what will be in this week’s share.


What’s your favorite summertime fresh produce? 

Monday, June 30, 2014

Crustless Spinach Quiche

A dear friend of mine has recently been diagnosed with a gluten-intolerance and it made me think about how lucky I am not to have any food allergies.  So many people have to worry about whether or not they can eat something or if it will make them sick.  Hopefully this recipe will be one that will fit with some dietary restrictions.  My husband has a minor case of lactose intolerance but the biggest effect it has on me is that we use Lactose free milk in the house, and I really don’t taste a difference.  For Megan, I decided to write a crustless quiche recipe, to eliminate the gluten. 

This is a really a BYO recipe.  I made this one with spinach and a mix of three cheeses, but you could really replace any green, cheese or even add/change it to protein.  (If you wanted your fill of gluten and wanted a crust, just roll out a store bought crust and place it on the bottom before adding the filling.)

The other week I made this same recipe with bacon and arugula and it was fabulous. The only addition was I cooked the bacon and then crumbled it up.  I actually made it the night before and then just placed it in the oven for about 10 minutes before breakfast with a friend. When doing a mix of greens and protein, I just do a less greens than listed here.  In this quiche the spinach is the star, so there happens to be a lot of it, you could always reduce the amount if you like.  This is also one of my go-to’s for a brunch or if I have assorted leftovers that I’m not sure what to do with, throw them all in a quiche. 


  • A tbsp. or so of olive oil
  • One small-medium onion or half a large onion chopped
  • Black Pepper
  • 1 bunch of spinach or bag of spinach (or alternatively a box of frozen spinach completely thawed and all the liquid wrung out)
  • 1 clove of garlic chopped finely (or if you’re fancy use a garlic press)
  • ¼ c of Pecorino Romano cheese grated
  • ¼ c of shredded Swiss cheese
  •  ½ c of shredded cheddar cheese
  • 6 eggs
  • ¼ c of milk (I use 1% Lactiad Milk, but whatever you keep in the house is fine!)


1.  Preheat the oven to 350°F

2.  Warm up the olive oil in a skillet set on medium-high heat.  Add the onions and cook until translucent.  Add a few cracks of pepper if desired.

3.  Add the spinach, I don’t de-stem the spinach but you can if you like.  (If you’re using swiss chard or another tough stem green then definitely de-stem).  I tend to either rip the leaves in half or use them whole.  Depends on the size of the leaf I guess.   Cook until wilted, about 3-4 minutes or so.  You may need to add more olive oil as you wilt the spinach.  Use your discretion.


4.  Add the garlic and cook until golden brown, only a minute or so.  Be careful because garlic burns very easily and it becomes bitter when burnt.


5. Let cool slightly and transfer to the bottom of a pie plate.  Try to just get the spinach and onions and not any of the liquid. 

6.  Meanwhile, in fairly large mixing bowl beat the eggs and milk until foamy.  Add a tsp or so of pepper and mix in.  (I am purposely avoiding adding salt because the cheese is very salty so we don’t need any more)

7. Top the spinach mixture with the cheeses, stir gently.  Then carefully add the frothy egg mixture.  

(I place my pie plate on a cookie sheet so that its easier to get in and out of the oven and if it spills it does on the cookie sheet instead of the inside of my oven!)


8. Bake in the preheated oven for 50-60 minutes.  The edges should be a lovely golden brown.  


Sunday, April 6, 2014

The difference the right tool makes - Spring Confetti Cupcakes

I’ve always thought that my cake and cupcake decorating skills were subpar.  I’d have great flavors, great textures and then you’d look at it and be like – well at least it tastes great.  Or worse: the thought that appearances are deceiving and that it tastes much better than it looks. 

I’ve tried pastry bags with tips, icing guns, and no matter what I do I’d always end up with more icing on the plate, on the counters or on me rather than on the cupcakes.

But, as most people know, I’m stubborn.  And I’m going to keep trying at it! 
 
So I researched.  I looked in my cook books, I looked at Pinterest, I looked at blogs.  And then I found it!  Someone explaining how those darn pastry bags work and how to get that bakery style swirl.  (I was starting to think you only learned it in pastry school!)

What I found out is that all along I’ve been using the wrong size tip?!? No wonder it looked terrible and would take f-o-r-e-v-e-r.

So thanks to Sara and her blog Our Best Bites I was finally able to achieve some decent looking cupcakes! 
 
I bought the Ateco set that Sara recommended and tried out her directions this weekend.
 
 
The three big things that I learned were:


  • The consistency of the icing is critical
  • Be sure to pack the icing into the pastry bag so there are no air bubbles.
  • Icing tip size matters – use a large or a jumbo size tip


I call these cupcakes spring funfetti cupcakes with very vanilla frosting and they are so easy!
 
99% of the time I make my cupcakes from cake mix, but the trick is to always make homemade frosting. You can doctor cake mix to be as good as homemade and you don’t have to worry about the leavening and whether it will rise or not because all of that is premeasured for you!

  • One box of white cake mix (whatever is on sale!)
  • Eggs (according to the directions)
  • Melted butter (same quantity as the box says for oil)
  • 1-2 tsp of vanilla
  • Spring sprinkles 


Preheat to the oven to the temperature on the cake mix and line a cupcake tin with liners.  
Melt the butter, Mix cake mix, eggs, butter and vanilla in the mixer and beat for 2 minutes.   Add the sprinkles and mix to combine. I didn’t measure the sprinkles, I just added enough to make the batter speckled and colorful.
 
The trick is to always make homemade buttercream.  I used Food Network’s Quick Vanilla Buttercream Frosting, but increased it to 2 tsp of vanilla. 
 
And voilà! Beautiful bakery quality icing job finished with a little bit of sanding sugar!


Sunday, March 16, 2014

Great-Aunt Mary’s Irish Soda Bread

Great-Aunt Mary’s Irish Soda Bread
Most of the family recipes that I have are from my Mom’s side of the family, but this one is from my Dad’s side and it’s a true classic “Clyne” recipe.  For those who don’t know my Dad is 100% Irish, which basically translates to will eat potatoes in any form and a requirement to make and eat Irish Soda Bread around St. Patrick’s Day.  This recipe comes from his Aunt Mary and probably dates back even further. 

Ingredients:
·         3 ½ cups flour
·         4 ½ tsp baking powder
·         1 tsp salt
·         ½ c sugar
·         1 c raisins
·         1 tbs caraway seeds (OPTIONAL**)
·         1 tbs shortening
·         1 egg beaten
·         1 ½ c buttermilk

I know lots of Irish Soda Bread Recipes have baking soda, (well duh you might think) but this one does not have any.  It does have a lot of baking powder that will take care of the rising.  Just trust me on it! I should probably call it Irish Baking Powder Bread, but it doesn’t have the same ring to it…

**Growing up in my house there was a large divide over whether caraway seeds should be in the Irish Soda Bread.  My Dad and I like it with them, while Mom and my brother liked it without. It was so bad that Dad had to make two every year, one with and one without.  The recipe works great either way; it simply depends on your preference.  I made them two this year, one with and one without.  The pictures below are for without.


1) Preheat the oven to 350°.  Prep a pie plate, I just use some plain cooking spray, but you could grease it with butter.  Alternatively you could use a cookie sheet lined with parchment paper depending on what you had.

2)  Mix the dry team: flour, baking powder, salt, sugar, raisins, caraway seeds (if using)


3)  Add the shortening to dry mixture and break it up with your hands. 

4)  Add the beaten egg to the mixture. 


5)  Gradually add buttermilk. It may be tough to mix, but get those hands in there and you can do it!   
Be sure to not overwork the dough, unlike yeast breads you do not need to knead it.


6)  Cut a cross on the top of the dough.  It gives the bread room to rise and is traditionally done to represent warding off the devil and protecting the household.


7)  Bake for 50 – 60 minutes.  Check to make sure a tooth pick comes out clean. 

8)  Let cool on a wire rack.  Enjoy warm or completed cooled with butter!


Happy St. Patrick’s Day!! 

Sunday, February 2, 2014

Souper-Bowl Sunday - Chicken Orzo Soup


Chicken Orzo Soup

1 package of split chicken breast (2.5 – 3lbs)
6 cups of chicken stock (I like Kitchen Basics,  this is about a box and a half)
1 onion (diced)
2 dried bay leaves
1 clove of garlic
3-4 stalks of celery (diced)
3-4 carrots cut into rounds
1/3 cup of dried orzo (or any other type of pasta, tortellini works great too!)
¼ grated Pecorino Romano cheese
2-3 tbsp of chopped flat leaf parsley
Salt and Pepper to taste

When I make soup it is for one of two reasons, one: My husband is sick and he is requesting “magic soup” or two: I have leftover pieces that I’m not sure what to do with so let’s throw it all into a soup (definitely a trick that I learned from my mother).

First thing to notice about this recipe is all the measurements are approximations.  I apologize to those who really like precise measurements, but this is not one of those meals.  And to quote my grandmother “Cooking is an art, but baking is a science.”  Baking is a science because you need certain reactions to occur in order, for example, the cake to rise.   


(Poor parsley got left out of the picture)

1) In a large stock pot (I used a 6 quart one) place the chicken breast, diced onion, bay leaves, chopped garlic clove (or use a garlic press) and chicken stock, and some black pepper.

2) Add some water if needed to get about 3/4 filled. 


3) Turn the heat to medium high to bring to a boil.  Once boiling reduce the heat to medium low to simmer.  Allow soup to simmer for 1½ hours. 

4)  I use this time to prep some other pieces.  Such as dicing the celery and cut the carrots.  I like to cut carrots on about a 45° angle to maximize the surface area.  Only a math teacher would think like that!   Then throw some tv, I hear there might have been a game today….


5) After the chicken has cooked, remove it from the pot and let it cool in a separate bowl. Remove the bay leaves as well. Depending on how fatty the chicken breast was you may want to skim some of the fat off of the top of the soup. 

6)  Place the pot back on the stove and turn the temp to medium.  Toss in the carrots and celery and cook for 30 minutes.   (Again back to the tv)
 
7) Next add the dried pasta and cook depending on the package.  If you want you can use fresh pasta, it will just be faster.

8) Now the chicken has cooled off, remove it from the bones, toss the skin and cut and/or shred the chicken.

9) Check the done-ness of the pasta.  Once it’s completely cooked add the chicken back in, Pecorino Romano cheese and parsley.  Add salt and pepper to taste.  I don’t use much salt, because the cheese is very salty. 


 When I made it this weekend I ended up with 3 quarts, which all got donated to a fundraiser at church for a family in need.  The final soup is very thick, but you could easily make 4 quarts by adding more liquid, (a mix of chicken stock and water) but this is how my husband likes it.  

 I love this recipe because it is nice and easy and it one of the first recipes that I adapted to make my own.  Enjoy!